Paymentree Pay@Table requires a Clover payment terminal from Paymentree which supports performing Pay@Table transactions.
It is designed to be used with the Restaurant module in Idealpos.
In addition to the requirement of the Restaurant Module, you will need to have the Paymentree Pay@Table module enabled in your licence to configure and use this function.
Please speak to either our Sales team or your reseller for further information about this module.
Each step required to configure Paymentree Pay@Table is listed below.
Click on the step title for more information about completing that step:
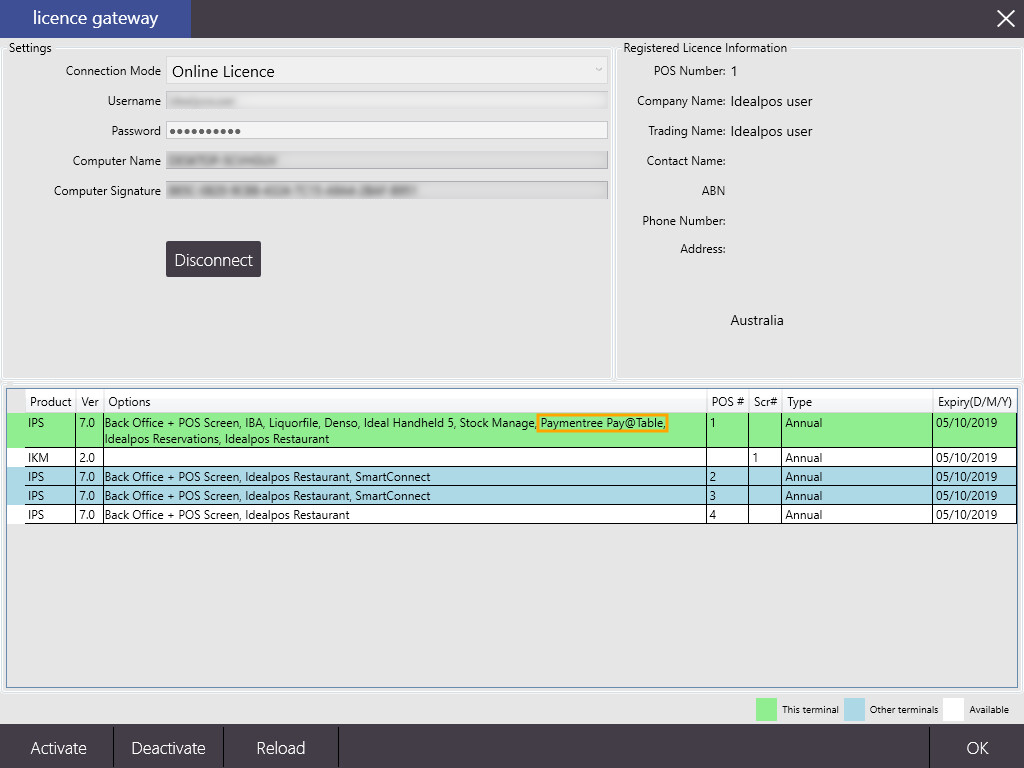
To check whether your system is licensed for the Paymentree Pay@Table function, go to:
Setup > Licence Gateway
If you are licensed for this module, "Paymentree Pay@Table" will appear under the Options column.
Should the module not be licensed, please contact Idealpos Sales or your Reseller for more information about enabling this module.
We suggest that this module is licensed on the same terminal which is configured as the POSServer.
Before continuing with the steps below to configure Paymentree Pay@Table, ensure that POSServer has been enabled and the POSServer IP address is configured in Global Options.
If POSServer is already enabled and configured on your system, you can skip this entire step.
Start POSServer by going to Start > Idealpos Solutions > POSServer.
Should the POSServer not appear in the Start Menu, it can also be started by going to C:\Program Files\Idealpos Solutions\POSServer\POSServer.exe.
When starting POSServer, ensure that you Run as Administrator (right-click on the icon and select "Run as Administrator").
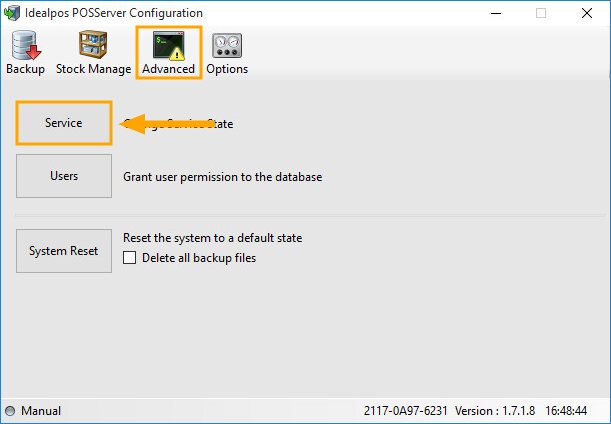
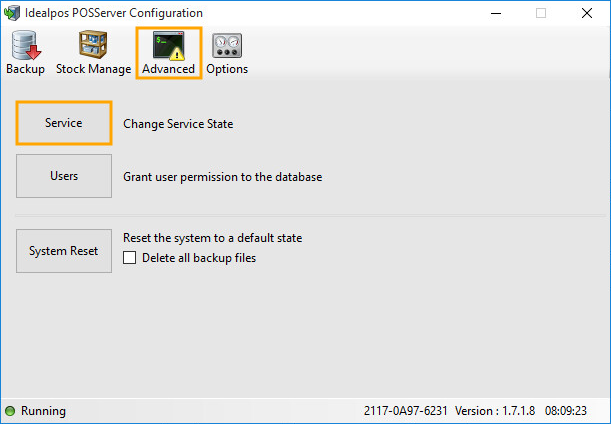
In the Idealpos POSServer Configuration, click on Advanced, then click on the Service button.
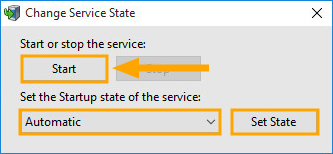
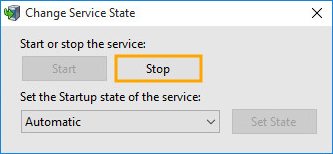
From the Change Service State window, ensure that the Startup state of the service is set to Automatic.
If not, change the state to "Automatic", then press the "Set State" button.
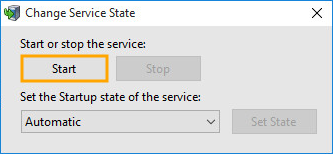
Finally, ensure that the service is running. To Start the Service, press the "Start" button.
Close the Change Service State window.
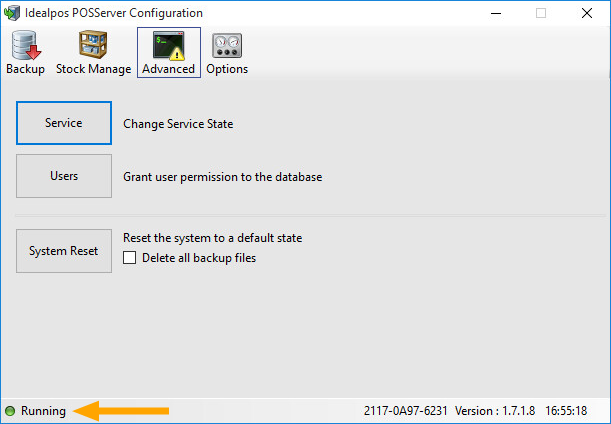
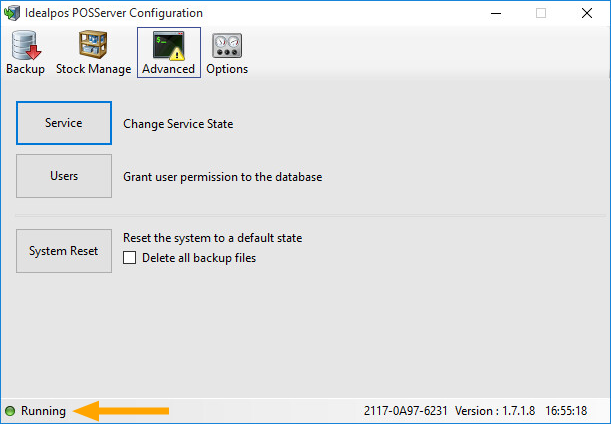
The Idealpos POSServer Configuration window should show "Running" on the bottom-left corner of the window to indicate that the service is running.
Close the Idealpos POSServer Configuration window.
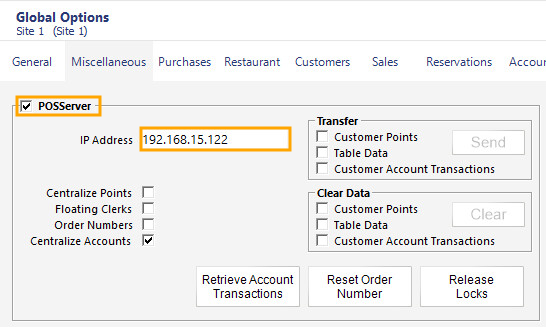
Then go to Idealpos > Setup > Global Options > Miscellaneous
Enable the POSServer checkbox, then enter the IP address of the POSServer.
In this example, the IP address of the POSServer PC is 192.168.15.122
Then close the Global Options window.
A Warning Prompt will be displayed advising that you are about to change the POSServer IP address.
Press "Yes" to continue.
Another prompt will be displayed to restart all POS systems with this change.
Press OK to dismiss the prompt, then restart Idealpos on all POS terminals
The Clover Payment Device is running a version of Android so the interface should be slightly familiar to anyone who has previously used an Android Phone or Tablet device.
The Clover device connects via a WiFi connection, so you will need to ensure that you have an available WiFi connection to configure the Clover device.
Also take note that the Clover device can only connect to secure wireless networks; it does not support connecting to Open and WEP networks.
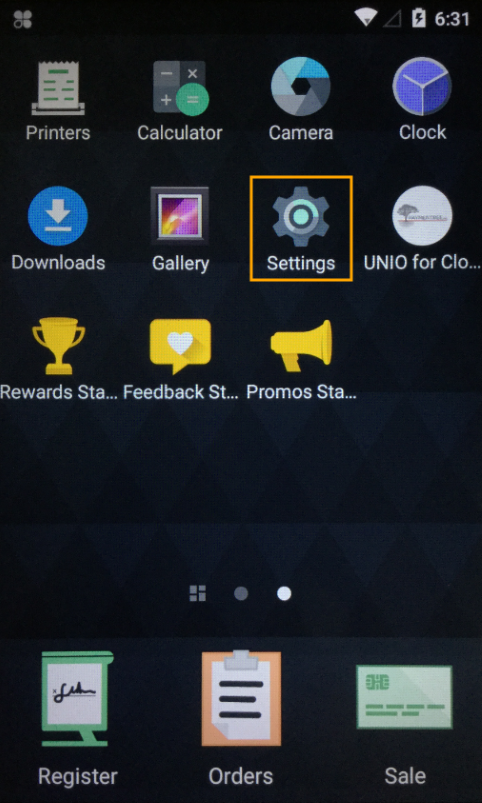
From the main Clover device screen, click on the Settings app/icon.
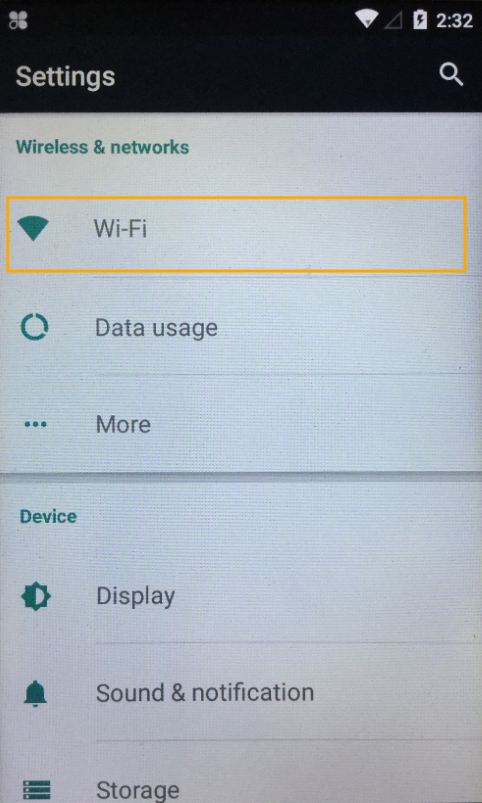
After selecting Settings, you will need to select the "Wi-Fi" option.
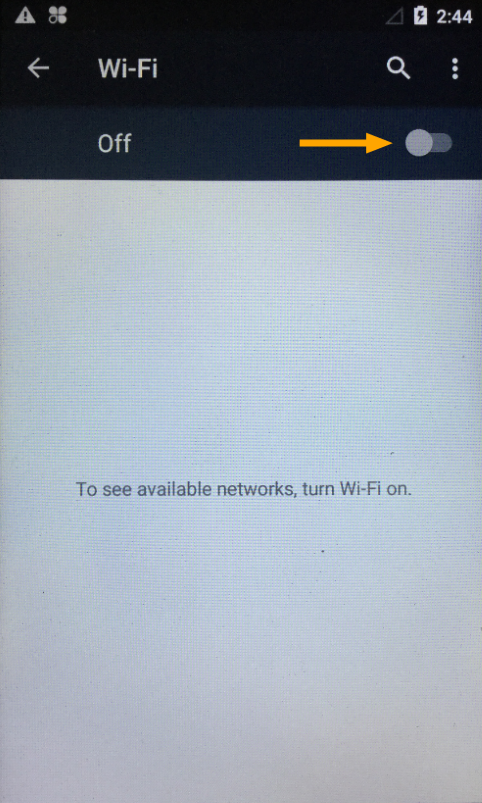
WiFi must be enabled in order to search for your Wi-Fi network.
If Wi-Fi is disabled, you will see "Off" displayed.
Simply press the slider switch on the right-hand side of the screen to enable Wi-Fi.
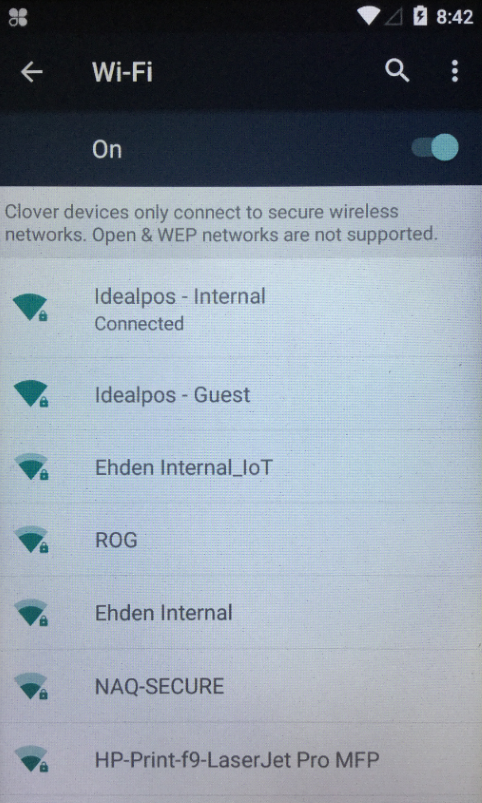
After Wi-Fi is enabled, you will see a list of Wi-Fi networks.
Select your Wi-Fi network from the list by clicking/tapping on it.
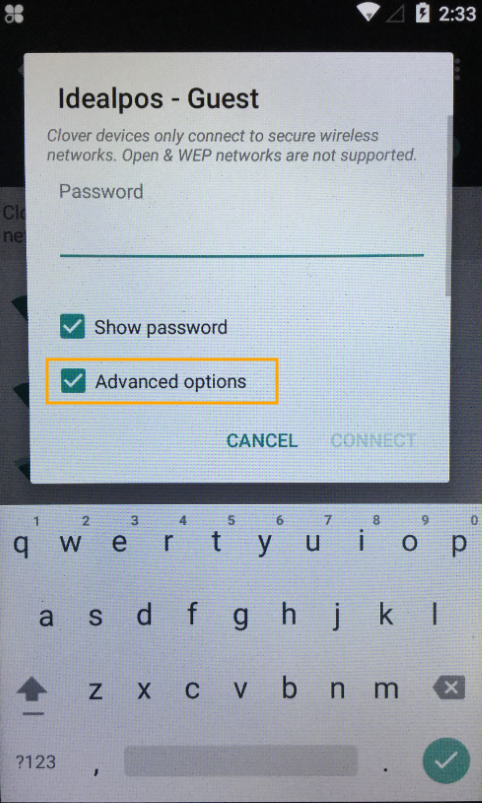
You will be prompted to enter the Password.
After entering the WiFi password, ensure that you enable the "Advanced Options" tickbox and configure a static IP address (more on this below)
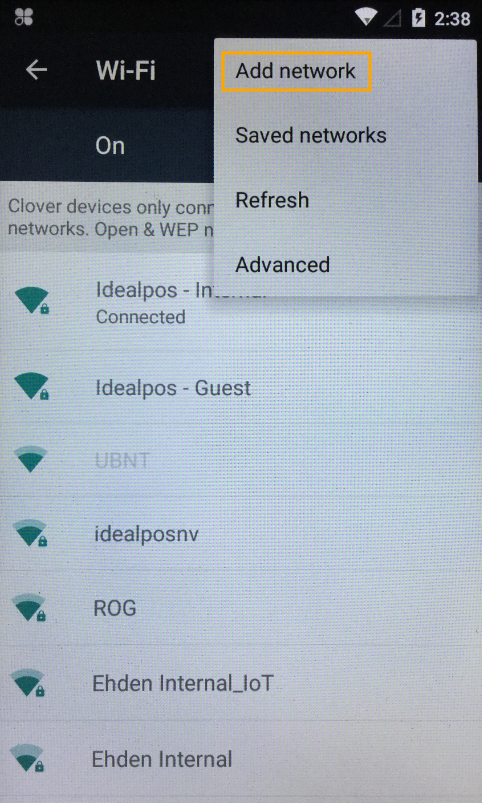
Note that if your Wi-Fi is not broadcasting the SSID (Wireless Network Identifier/Wireless Network Name), you will need to add the network manually by clicking on the three dots displayed on the top-right corner of the Wi-Fi screen, then select "Add network".
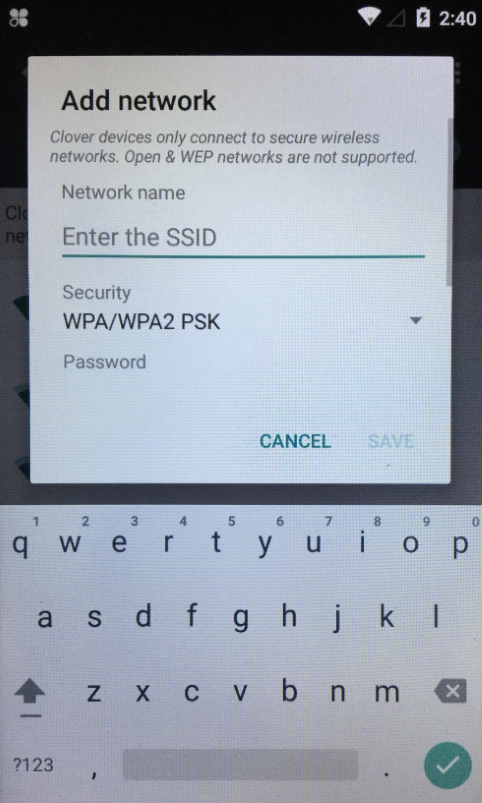
You will then need to enter the Network name/SSID, Type of Security, Password.
You can access additional settings by swiping down on the screen.
Whether you added the Wi-Fi network by selecting it from the list or by manually entering the SSID, the device will need to have an IP address configured.
By default, the Clover device will use DHCP to automatically assign an IP address from the DHCP server.
Using DHCP to assign an IP address will result in the IP address changing from time to time, which will therefore result in lost connectivity between Idealpos, Paymentree software and the device.
Therefore, we strongly recommend assigning a static IP address to the Clover payment device in order to maintain a persistent connection.
When joining the WiFi network, ensure that you enable the "Advanced Options" tickbox, then swipe down/scroll down on the screen to reveal additional options.
If using a Proxy, you may want to select the Proxy dropdown box and select the required options, then enter the Proxy details to connect to your Proxy server.
If a Proxy is not used, ignore the Proxy step and move onto IP settings below.
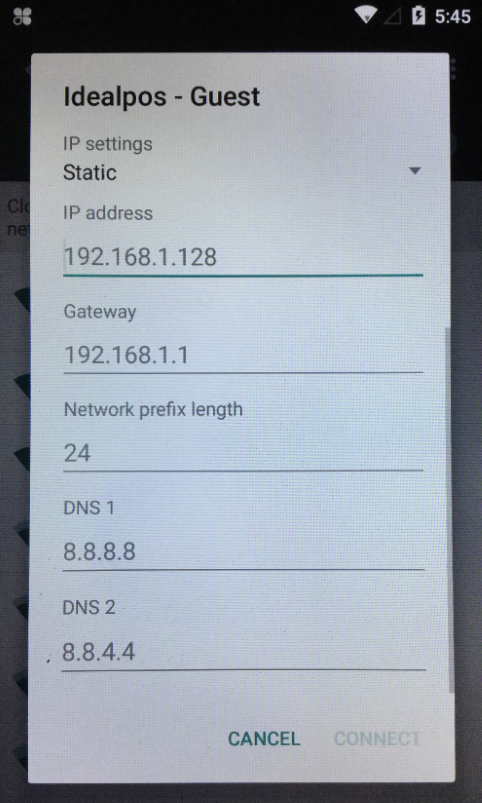
From the IP Settings dropdown box, select "Static".
Then enter the IP address, Gateway, Network prefix length, DNS 1 and DNS 2.
Note that the Network prefix length is used to configure the Subnet Mask.
It is also important to note that even though the Network Prefix Length is used to configure the Subnet Mask, the actual format of the Network Prefix Length is different to the Subnet Mask.
E.g. Do not enter 255.255.255.0 into the Network Prefix Length.
We have included a table below of the typical Subnet Masks and their equivalent Network Prefix Lengths.
In the Network Prefix Length field, enter the value that corresponds to your Subnet Mask from the below table:
If your required Subnet Mask does not appear in the table below, you may search for an IP Subnet Calculator via your preferred search engine.
When viewing Subnet Masks from your IP address calculator, the Network Prefix Length is typically shown after the Subnet Mask in a format of:
Subnet Mask /Network Prefix Length.
E.g. 255.255.255.0 /24
A Subnet Mask shown above indicates that the Network Prefix Length is 24
Subnet Mask | Network Prefix Length |
255.0.0.0 | 8 |
255.255.0.0 | 16 |
255.255.255.0 | 24 |
Once you have configured the Static IP address on the Clover device, press the "Connect" button and the device will establish a connection to your Wi-Fi network.
Note that the Connect button will appear greyed out if the password has not been entered (or if the entered password is 7 characters or less.
The status displayed on the Wi-Fi connections screen will show "Connected" below it to indicate that it has successfully connected to the Wi-Fi network.
To test connectivity with the Clover device, you can perform a ping command from a PC connected to the same network as the Clover device.
Open the Windows Command Prompt (Either search for cmd in the Windows Start menu, or press the Windows Key + R, then enter "cmd" and press "OK").
In the command prompt window, enter "ping [ip address]" - substitute ip address with the Clover device IP address.
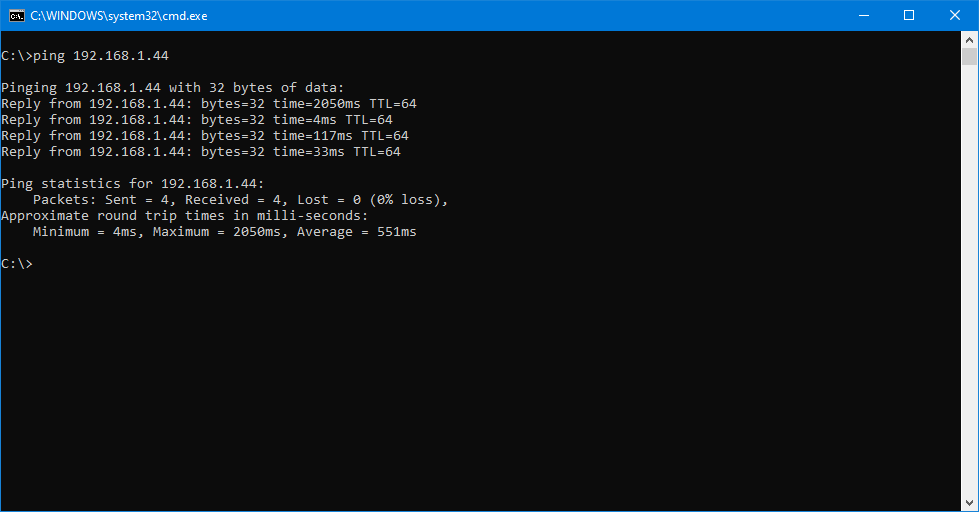
E.g. If the clover device has an IP address of 192.168.1.44, enter "ping 192.168.1.44" into the Command Prompt window.
If the Clover device is successfully connected to your network, a ping request should receive a reply from the Clover device IP address, indicating that the device is successfully connected to your network.
The below shows a successful ping response from a Clover device which has an IP address of 192.168.1.44.
Once the Clover device is successfully connected to the network, continue to the next step below which involves installing and configuring the Paymentree software as well as configuring Idealpos.
The Paymentree software can be acquired directly from Paymentree.
The version of Paymentree used in this guide is 5.17.7.97.
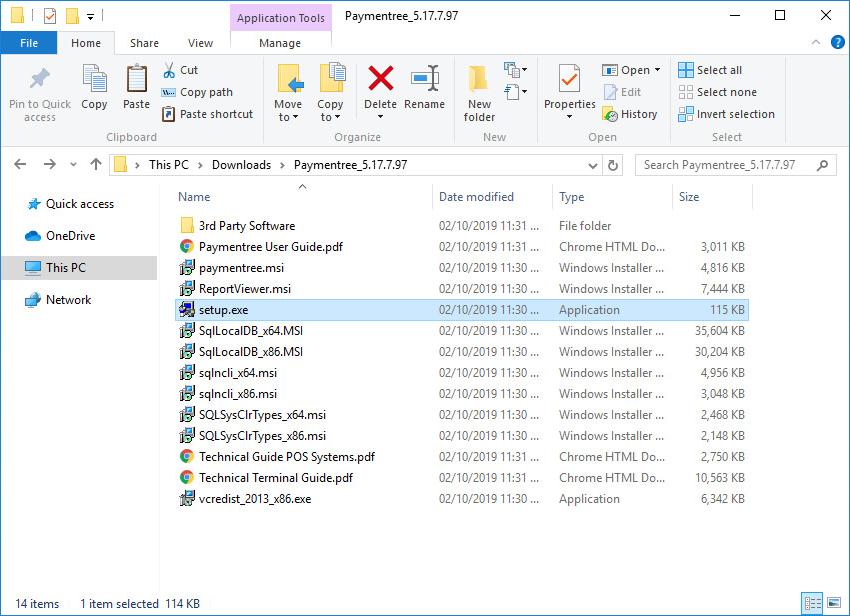
The software will be obtained in the form of a zip file; extract the entire contents of the zip to a new folder of your choice.
Once extracted, run the setup.exe file.
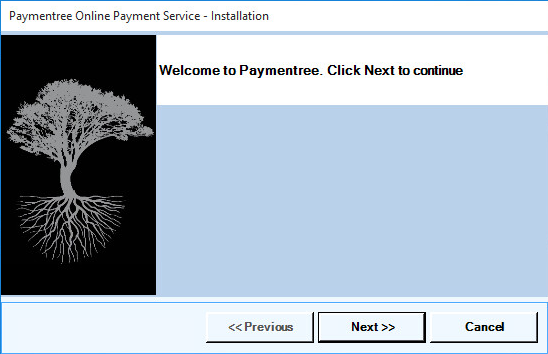
After running setup.exe, press the "Next" button to continue.
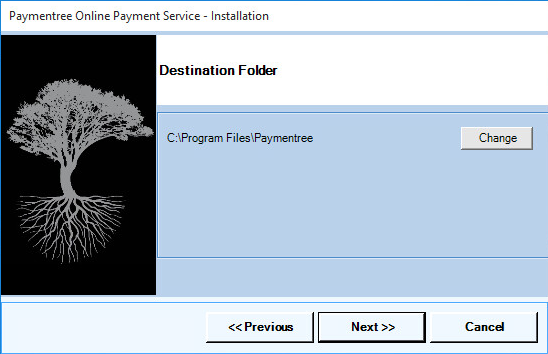
Accept the default destination folder, then press the "Next" button to continue
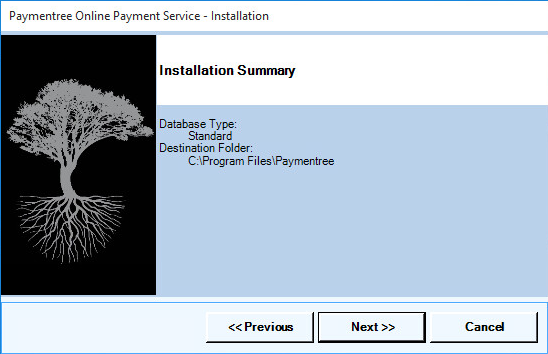
The Installation Summary will be displayed. Press "Next" to continue.
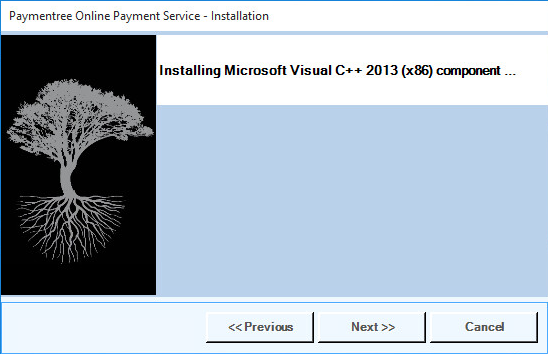
The install file will automatically install the required components. The exact components which you'll see being installed can vary between systems, depending on whether or not the required components have already been installed.
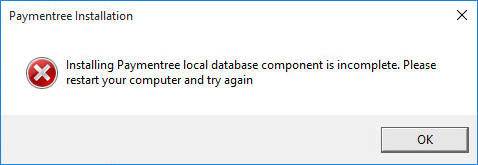
There is a possibility that you might encounter the following error.
If the below error occurs, follow the instructions on the error (Restart your computer and try to run the install again after the restart).
When re-attempting to run the install, simply run the Setup.exe again and press "Next" until the install starts.
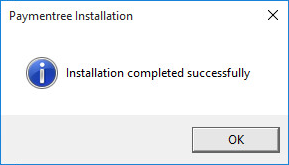
The installation should display the following prompt after it has been completed successfully.
Press OK to dismiss the prompt.
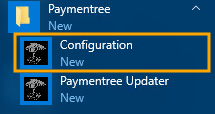
After pressing OK, you will need to start the Paymentree Configuration.
Go to Start > Paymentree > Configuration.
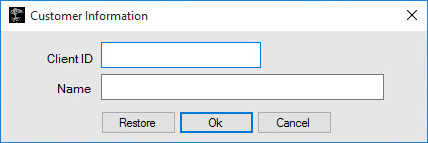
A prompt will be displayed to enter the Client ID and the Name.
These details should have been supplied by Paymentree.
If you don't have these details, please contact Paymentree and they should be able to supply them.
The Client ID is a unique ID and the Name will be your Business or Trading name as assigned by Paymentree.
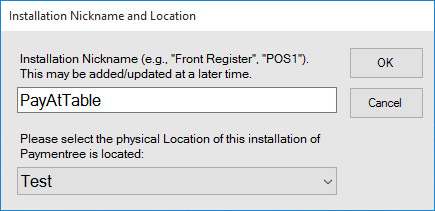
You will then be prompted to enter an Installation Nickname and will also be asked to select the physical location where the installation of Paymentree is located.
Enter any Nickname you want, select a Physical Location, then press "OK". Note that the physical location is required and cannot be left as blank.
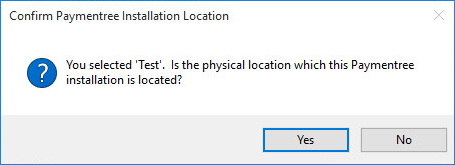
A Confirmation prompt will appear.
Press "Yes" to confirm your selection.
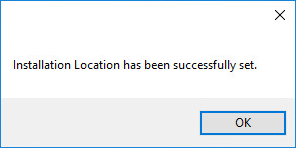
A successful prompt may appear to indicate that the Installation Location was successfully set.
Press "OK" to close the prompt.
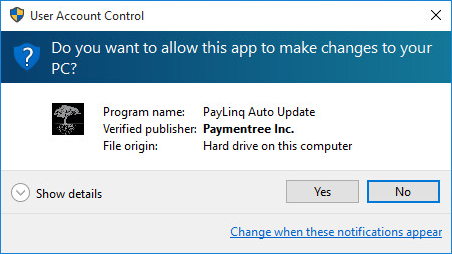
If Windows User Account Control (UAC) is enabled, press "Yes" to allow the app to make changes to your PC.
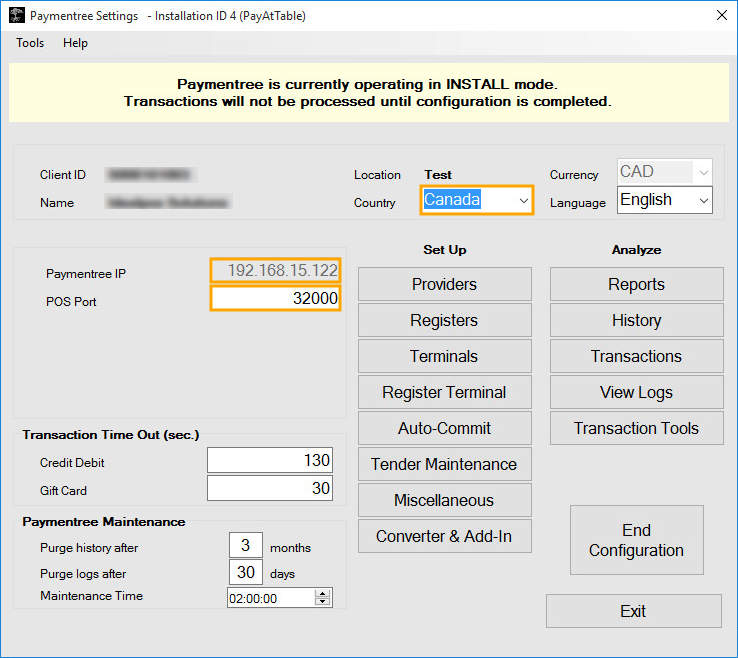
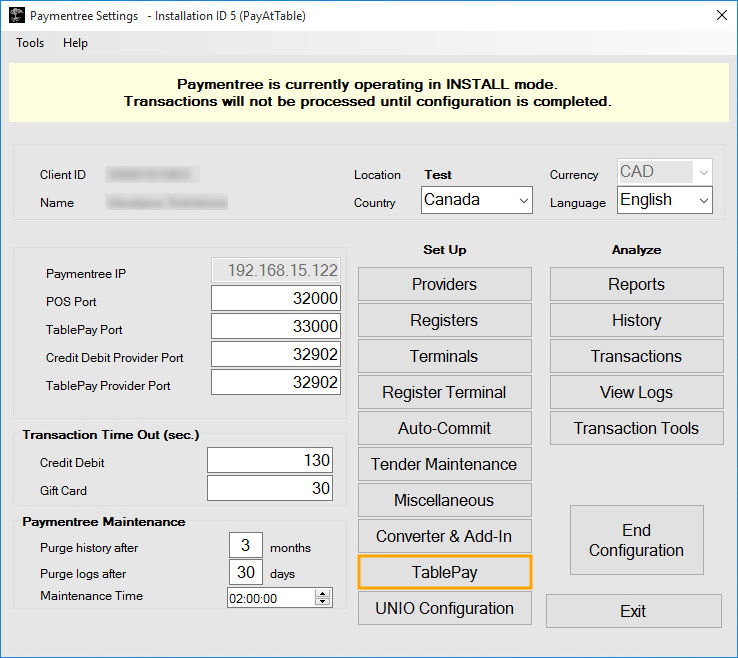
The Paymentree Settings window will appear in "INSTALL mode".
Additional configuration can now be completed.
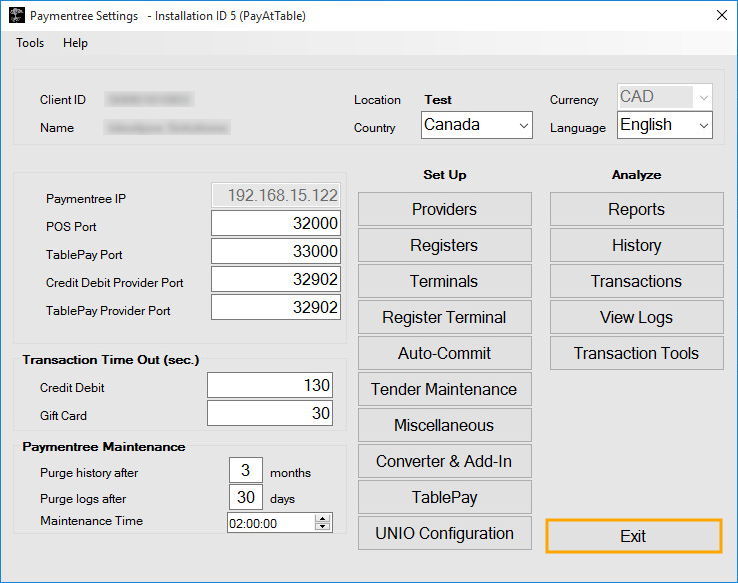
Select the Country for location or region in which Paymentree is being installed. The Currency field will be auto-selected based on the Country selected.
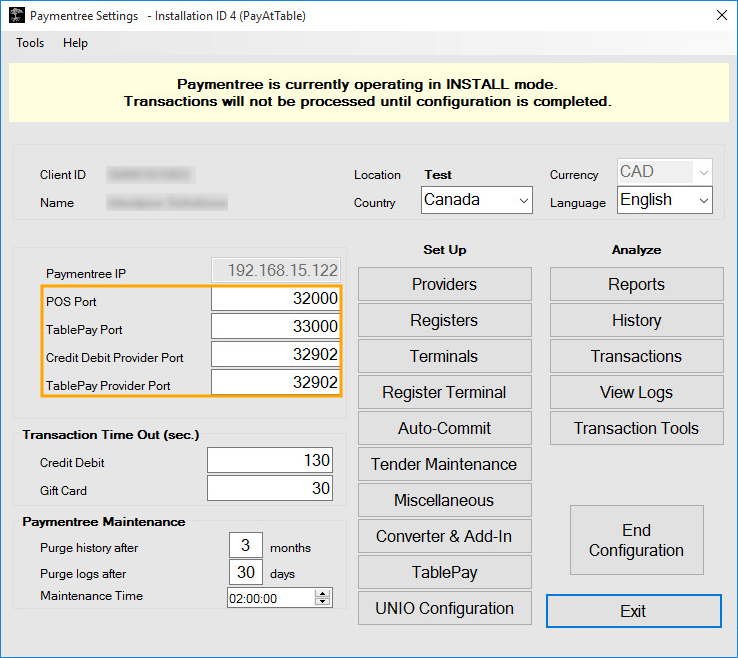
The Paymentree IP is the IP address of the local PC which the application is installed on.
The POS Port should be automatically populated with 32000, if not, enter 32000 into the POS Port field.
After ensuring that the above are configured, press the "Providers" button located next to the Paymentree IP/POS Port.
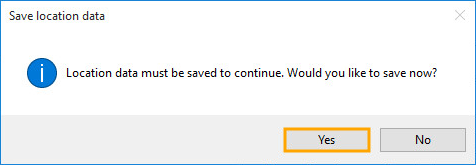
You may see a prompt "Location data must be saved to continue. Would you like to save now?". Press the "Yes" button to continue.
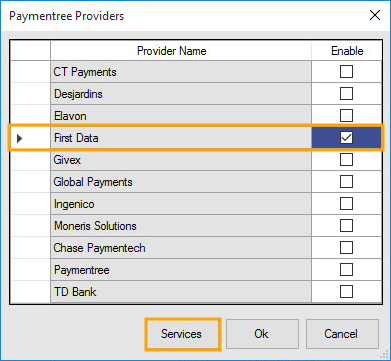
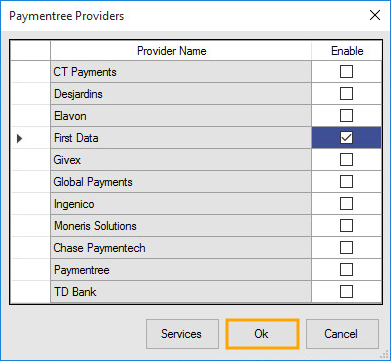
A list of Paymentree Providers will be displayed.
Enable the tickbox next to "First Data", then press the "Services" button.
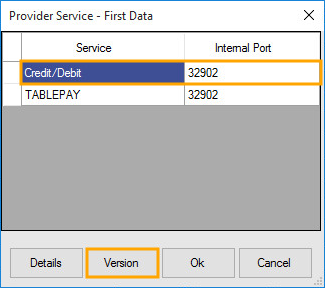
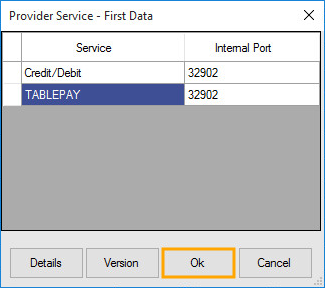
A list of Provider Services will be displayed.
Select Credit/Debit from the list, then press the "Version" button.
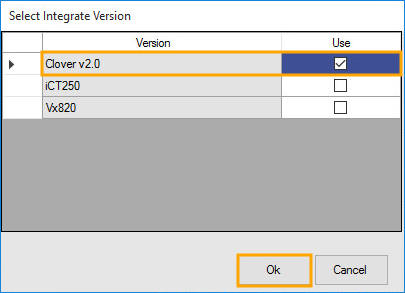
On this screen, enable the "Use" tickbox next to the Clover v2.0 device then press "OK".
This setting tells Paymentree what type of device is being used.
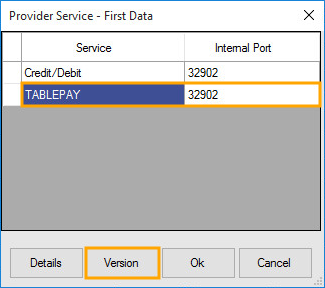
From the list of Provider Services, select "TABLEPAY", then press the "Version" button.
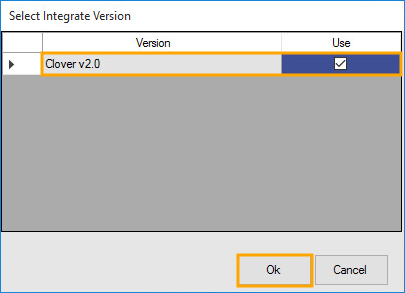
On this screen, enable the "Use" tickbox next to the Clover v2.0 device then press "OK".
Again, this setting tells Paymentree what type of device is being used.
Now that the Clover v2.0 device has been enabled for the Provider Services, press the "OK" button.
Now that the Paymentree Provider has been configured, close the Paymentree Providers screen via the "OK" button.
You will notice that there are now additional fields being displayed.
Ensure that the following Port Numbers exist in each of the below fields:
TablePay Port - 33000
Credit Debit Provider Port - 32902
TablePay Provider Port - 32902
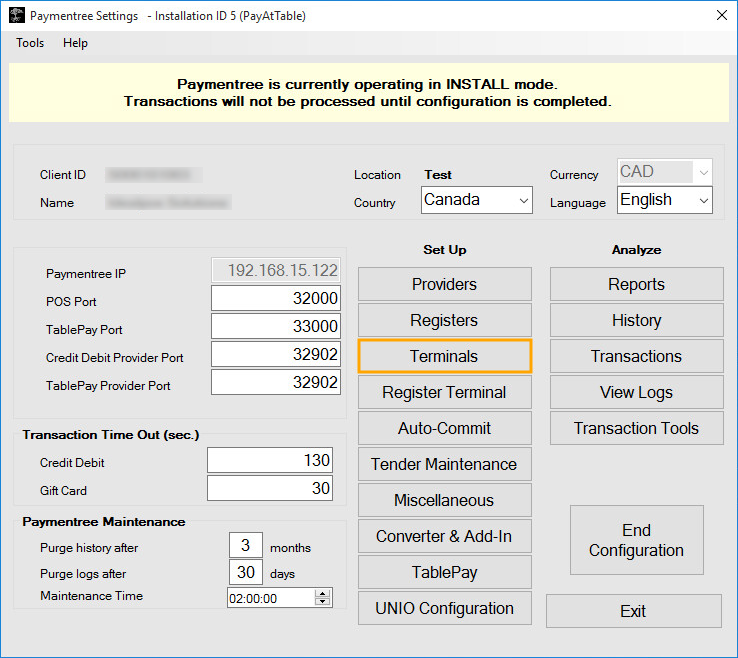
Once configured, you will then need to press the "Terminals" button to add the Clover Payment Device
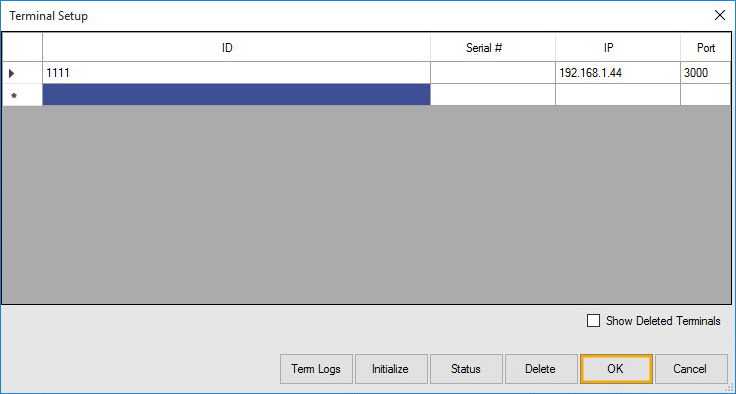
In the ID field, enter 1111
In the IP field, enter the Clover Device's IP address. This will be the static IP address as configured in the previous steps further above.
The IP address can also be retrieved from the device by going to the Clover Device Android Home Screen, then selecting Settings > Wi-Fi > Holding down on the Connected Wi-Fi network and selecting "Modify network". The current IP address will be displayed at the top of the screen.
In the Port field, enter 3000.
The below example shows a Clover terminal with an IP address of 192.168.1.44 configured in the Terminal Setup screen.
Once the above details have been entered, move to the next line in the Terminal Setup screen then press "OK"
After pressing OK, you will return to the Paymentree Settings screen.
Select "TablePay".
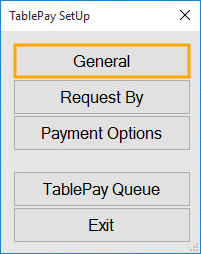
A "TablePay SetUp" screen will appear.
Press "General"
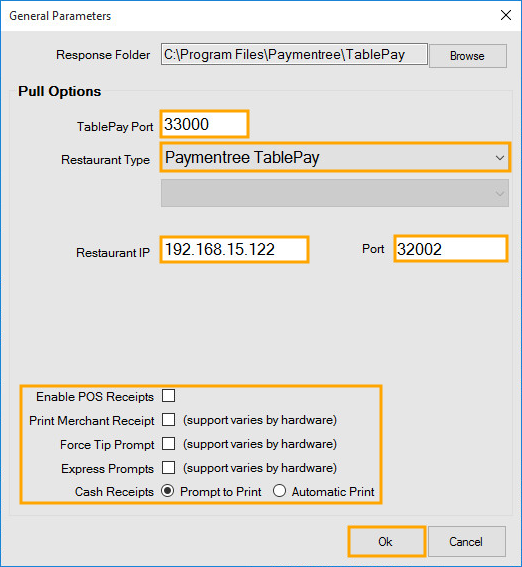
From the General Parameters screen, enter the following configuration settings:
TablePay Port - 33000
Restaurant Type - Paymentree TablePay
Restaurant IP - Enter the IP address of the system running Idealpos POSServer
Port - 32002
Uncheck all boxes at the bottom of the screen except for "Express Prompts"
Set Cash Receipts as "Prompt to Print"
Then press "OK"
The below example shows a Restaurant IP of 192.168.15.122 which indicates it is connecting to a POSServer running at this address.
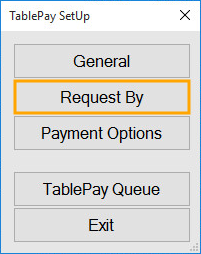
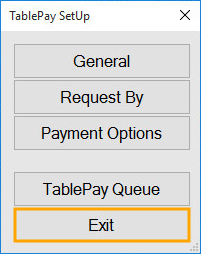
From the "TablePay SetUp" screen, press "Request By".
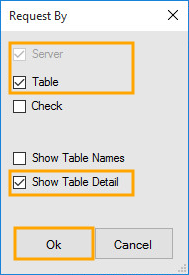
In the "Request By" window, ensure that all checkboxes are enabled except for "Check" and "Show Table Names".
The only enabled checkboxes should be "Server", "Table" and "Show Table Detail".
Then press "OK"
On the TablePay SetUp screen, press "Exit"
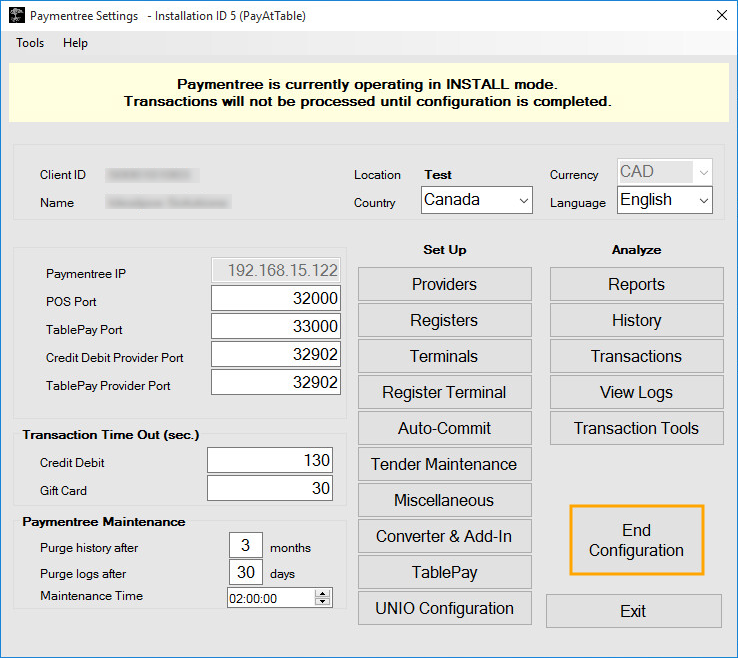
Now that the above configuration has been completed, you can press the "End Configuration" button to finalise and apply the settings.
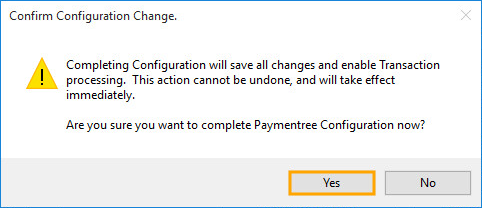
A prompt will be displayed to confirm the Configuration Change.
Press the "Yes" button to confirm and complete the Paymentree Configuration.
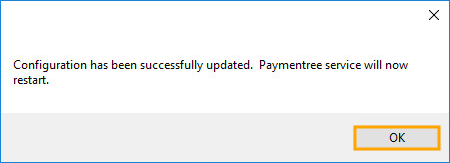
A prompt will confirm that the Configuration has been successfully updated and the Paymentree service will restart.
Press "OK" to continue.
The Paymentree service will now be re-initialised. Please wait
The above prompt will disappear after re-initialisation has completed.
You can then close the Paymentree Settings window by pressing "Exit".
Continue to the next stage of the setup below to enable Paymentree Pay@Table in the Idealpos POSServer.
To enable Paymentree Pay@Table in POSServer, open the Idealpos POSServer Configuration.
This can be done by going to Start > Idealpos Solutions > POSServer.
Should the POSServer not appear in the Start Menu, it can also be started by going to C:\Program Files\Idealpos Solutions\POSServer\POSServer.exe.
When starting POSServer, ensure that you Run as Administrator (right-click on the icon and select "Run as Administrator").
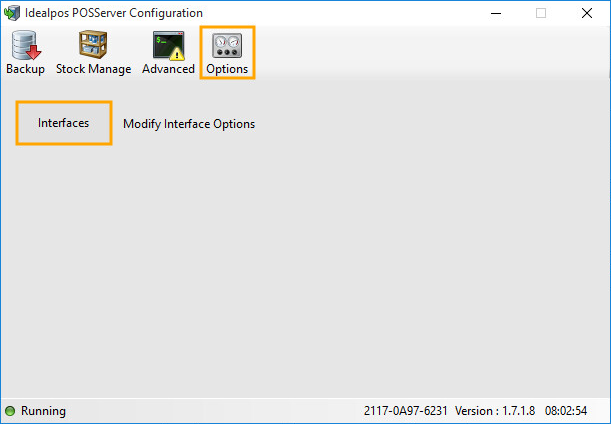
In POSServer Configuration, click on the Options button, then click on the Interfaces button.
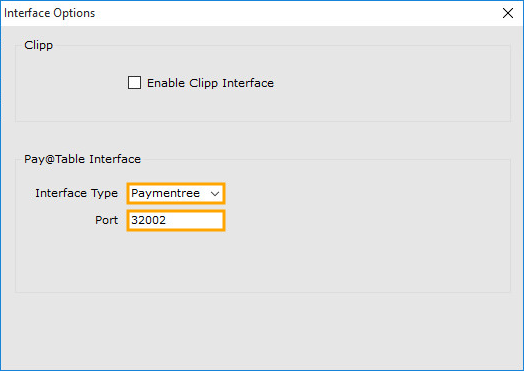
Under Pay@Table Interface, configure the Interface Type and Port as follows:
Interface Type - Paymentree
Port - 32002
The POSServer Service now needs to be restarted.
Close the Interface Options screen, then click on the Advanced button, then press the "Service" button.
Press the "Stop" button
Wait 10 - 15 seconds, then press the "Start" button
Close the Change Service State window.
The Idealpos POSServer Configuration window should indicate that POSServer is running as per the "Running" text shown on the bottom-left corner of the window.
Close the Idealpos POSServer Configuration.
The POSServer has now been configured for Paymentree Pay@Table.
Continue to the next step "Configure Pay@Table Interface in Idealpos" below.
In Idealpos, go to: Setup > Global Options > Interfaces
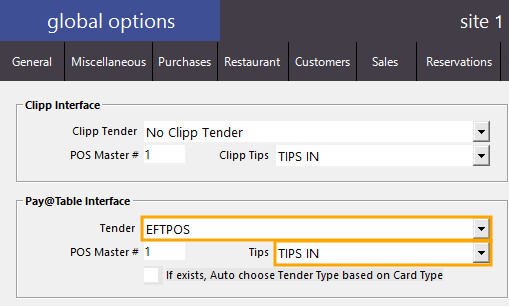
Under the Pay@Table Interface section, select the Tender Type from the dropdown box which will be used for taking payments from the Clover device.
This will typically be EFTPOS, however, your system might be configured with a different label such as CREDIT CARD, DEBIT, etc.
From the Tips dropdown box, select the type of Received Account that will be used for receiving tips against.
Close the Global Options window.
Continue to the next and final step below which involves configuring the "UNIO for Clover" application on the Clover device.
This is the final step for configuring Paymentree Pay@Table.
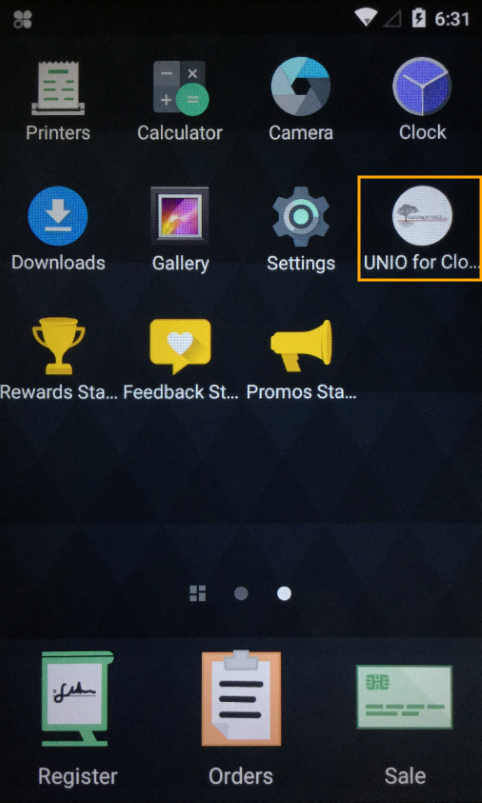
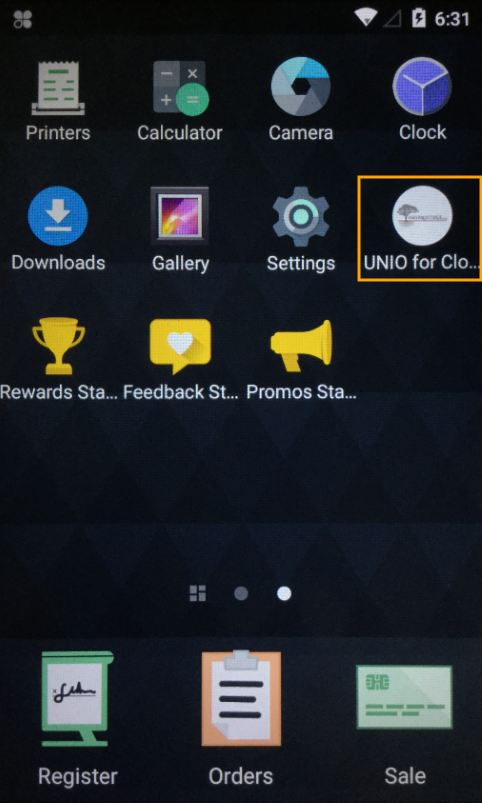
On the Clover device, go to the main home screen (similar to the main home screen of most Android devices) and look for the "UNIO for Clover" application.
Once the "UNIO for Clover" application has been located, open it.
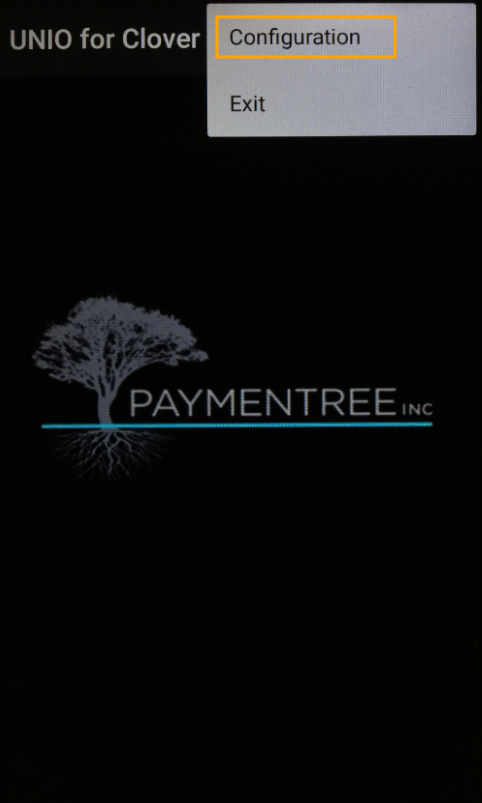
On the top-right corner of the screen, press the three dots.
Select the "Configuration" option.
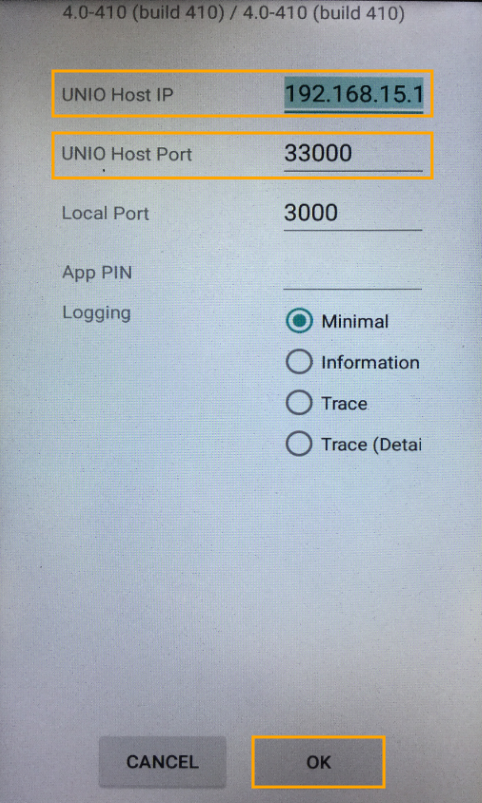
Configure as follows:
UNIO Host IP - Enter the IP address of your POSServer/System where Paymentree is installed.
Note that this field on the device does not have provision for showing longer IP addresses. Ensure that you enter the IP address correctly.
UNIO Host Port - 33000
Local Port - 3000
App PIN - [BLANK]
Logging - Minimal
Once configured, press the "OK" button at the bottom of the screen
We recommend completely closing and opening the app again in order for the changes to completely take effect.
This can be done by swiping up from the bottom of the screen, then pressing the small square icon.
This will display all apps which are currently running.
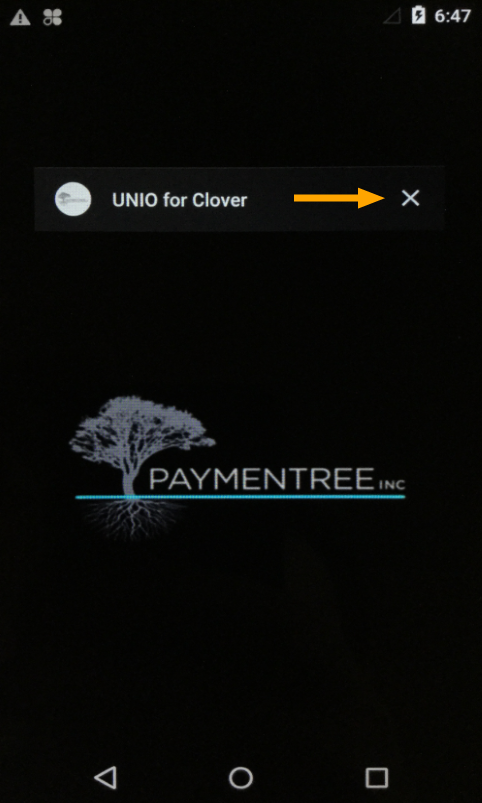
Either swipe the UNIO for Clover app to the left or right to close the app.
Alternatively, you can also press the "X" button on the top-right corner of the app window.
After closing the app, open it again from the main screen.
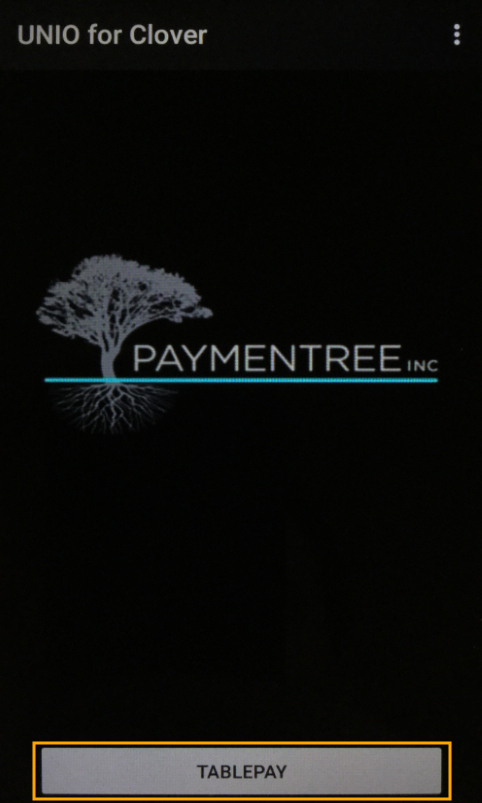
A TABLEPAY button should now appear at the bottom of the UNIO for Clover app screen.
This indicates that the app has now successfully established a successful connection with your POSServer and Paymentree software.
Paymentree Pay@Table is now ready for use.
For details on how to use the Paymentree Pay@Table device to pay a table, see the topic Using Paymentree Pay@Table.